
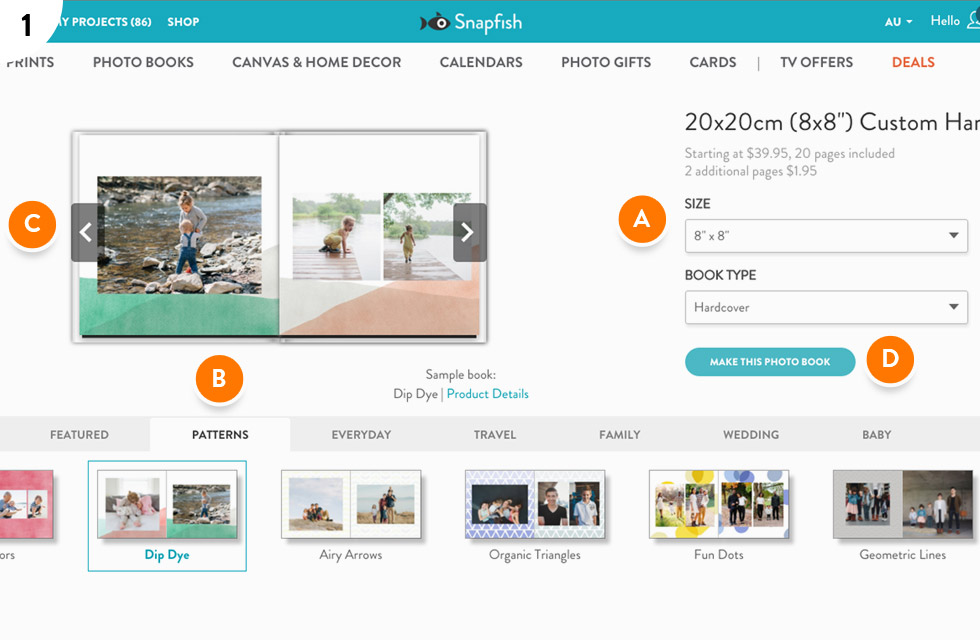
Choose your desired book from the PHOTO BOOKS page, then follow these steps:
A. Select a SIZE and BOOK TYPE (if you're still undecided).
B. Pick a design category (e.g. PATTERNS), then select a design (e.g. Dip Dye).
C. The book preview will be updated with the selected design.
D. Once you have chosen a design, select the MAKE THIS PHOTO BOOK button.
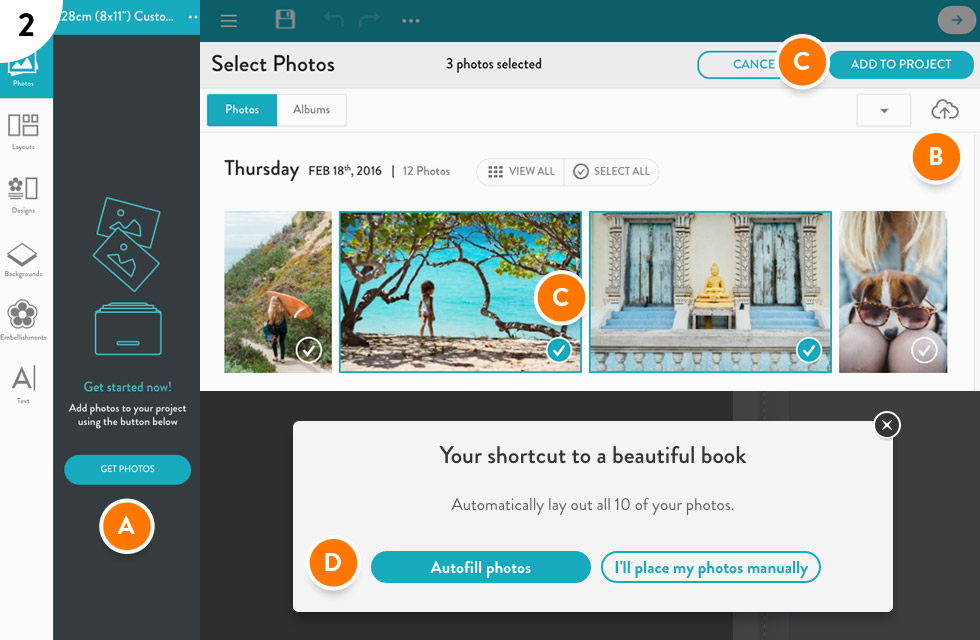
You’re now in the book builder with your selected design, ready to add photos:
A. Select the GET PHOTOS button to open the photo picker.
B. Import photos from your device, Facebook, Instagram or Flickr.
C. Select the photos you’d like to use, then select the ADD TO PROJECT button.
D. Select Autofill to automatically populate your book with your selected photos.
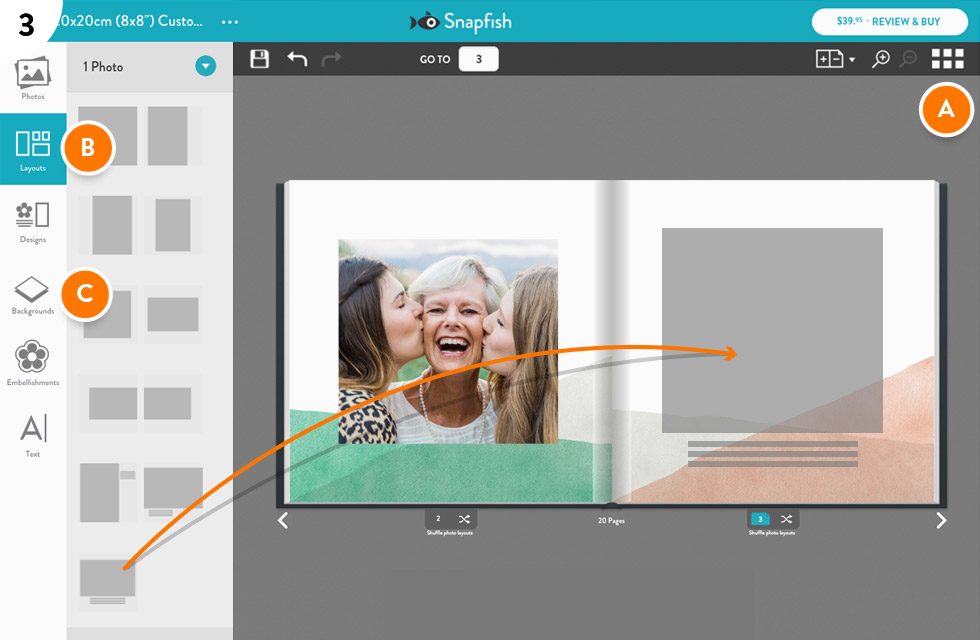
Once you start adding photos you may like to change the layout or background of a page:
A. To get an overview of your entire book, select the Book View icon at the top right of the book builder.
B. Layouts enable you to modify a page with the selected photo frame layouts.
C. Backgrounds enable you to change the backdrop of a specific page.
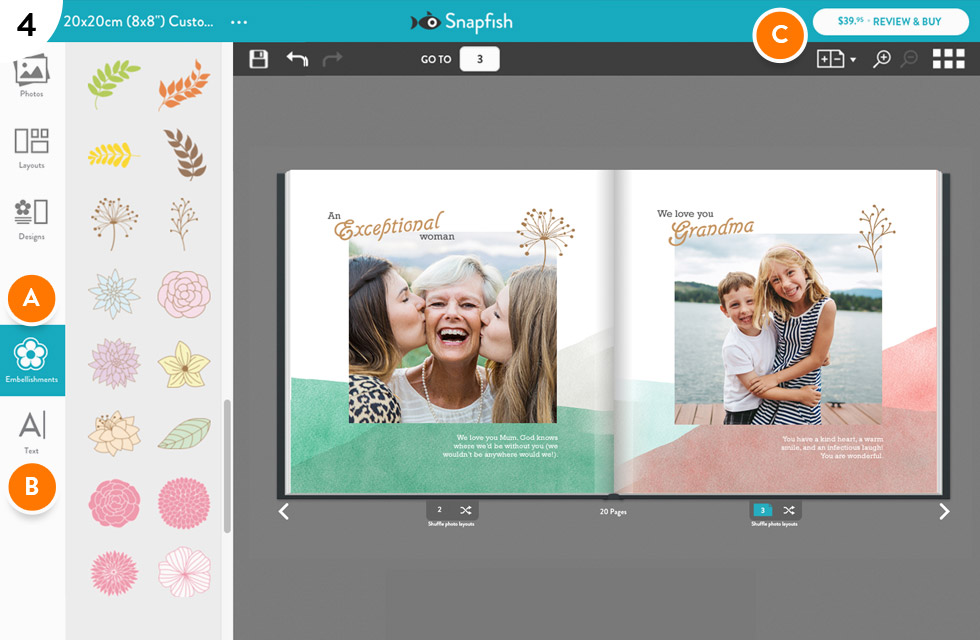
Personalise your book with text and decorate with embellishments:
A. Embellishments give you the freedom to explore your creative side. Add as many as you want!
B. Text enables you to add more personality to your book.
C. Once you’re satisfied, select the REVIEW & BUY button to give your book a final check over.
Congratulations! You’ve built your own personalised photo book.
We've compiled a few simple tutorials to help you get started with the new Snapfish builder.
The tutorials demonstrate how to import photos, use the various tools (ie. Layouts, Designs, Backgrounds, Embellishments and Text). As well as how to manipulate photos, add and remove pages and get you creating your own personalised photobook in a matter of minutes.
- Introduction to the photo book builder
- Creating a photo book using the Autofill feature
- Editing photos in a photo book
- Layouts, designs, backgrounds & embellishments
- Reordering, adding and deleting pages

print page name : book-guide
print page url : /store/book-guide
dcr path:
isFooterOff : true
isFooterOff1 : false
isItAmazonCobrand : false